Thursday, December 27, 2012

2013

Since the world didn't end, Christmas has passed, and I have a few precious days off, it's a good time to talk about my plans for next year.  2012 was an incredibly busy year for me.  I started a new job (and they have put up with me for almost a whole year now!) and between classes, shops and shows, Willow and Me Jewelry has been busier for me than ever.  I'm not complaining, but I do feel like I was pulled in too many directions this past year.  I have not felt comfortable with the level of service I have given the shops that carry my pieces, sometimes taking several weeks to get things to them.

And so after a lot of soul searching, I have decided to dial it back a bit in 2013.  I have decided not to do any shows and will only be teaching classes in the winter/early spring.  The summer and fall are just too busy with work.

I will still be making jewelry, and I have a couple of big projects in the planning stages.  As I indicated above, however, I will not be doing any shows in 2013.  You will still be able to purchase on my Etsy site and as of this moment, my jewelry is also sold at Archipelago in Rockland, primarily ocean-themed items.  I will be confirming with them in early 2013 their plans for the next season as well as other shops that have carried my jewelry in the past.

I will also be teaching two classes through RSU 24 Adult Education.  Both are Mixed Levels Precious Metal Clay, with times to accommodate different schedules.  My intention with the class is to have something for all levels of experience with PMC, from beginner on up.  I will be teaching specific subjects, but will also encourage students to plan their own pieces and I will be there to help them troubleshoot and make their vision a reality.  The dates and times will be Fridays from 5:30 to 9:00 on February 8 and 15 and March 1 and 8 or Saturdays 10:00 to 3:30 on March 23 and 30 and April 6.   The RSU will have pricing information on their website and in their catalog.  Contact them to register.

These are the only PMC classes I will be teaching in 2013, so if you are interested, I would suggest signing up for whichever alternative works for your schedule.

I have really enjoyed my work at the Woodlawn Museum and look forward to 2013.  I do miss working with metal clay full time, but financially that was just not feasible for me.  I hope that these changes in schedule will help me feel less as if I am spread too thin and enable me to enjoy everything a bit more, as well as to take some time for myself.   I also hope to focus more on quality than quantity in my jewelry pieces. 

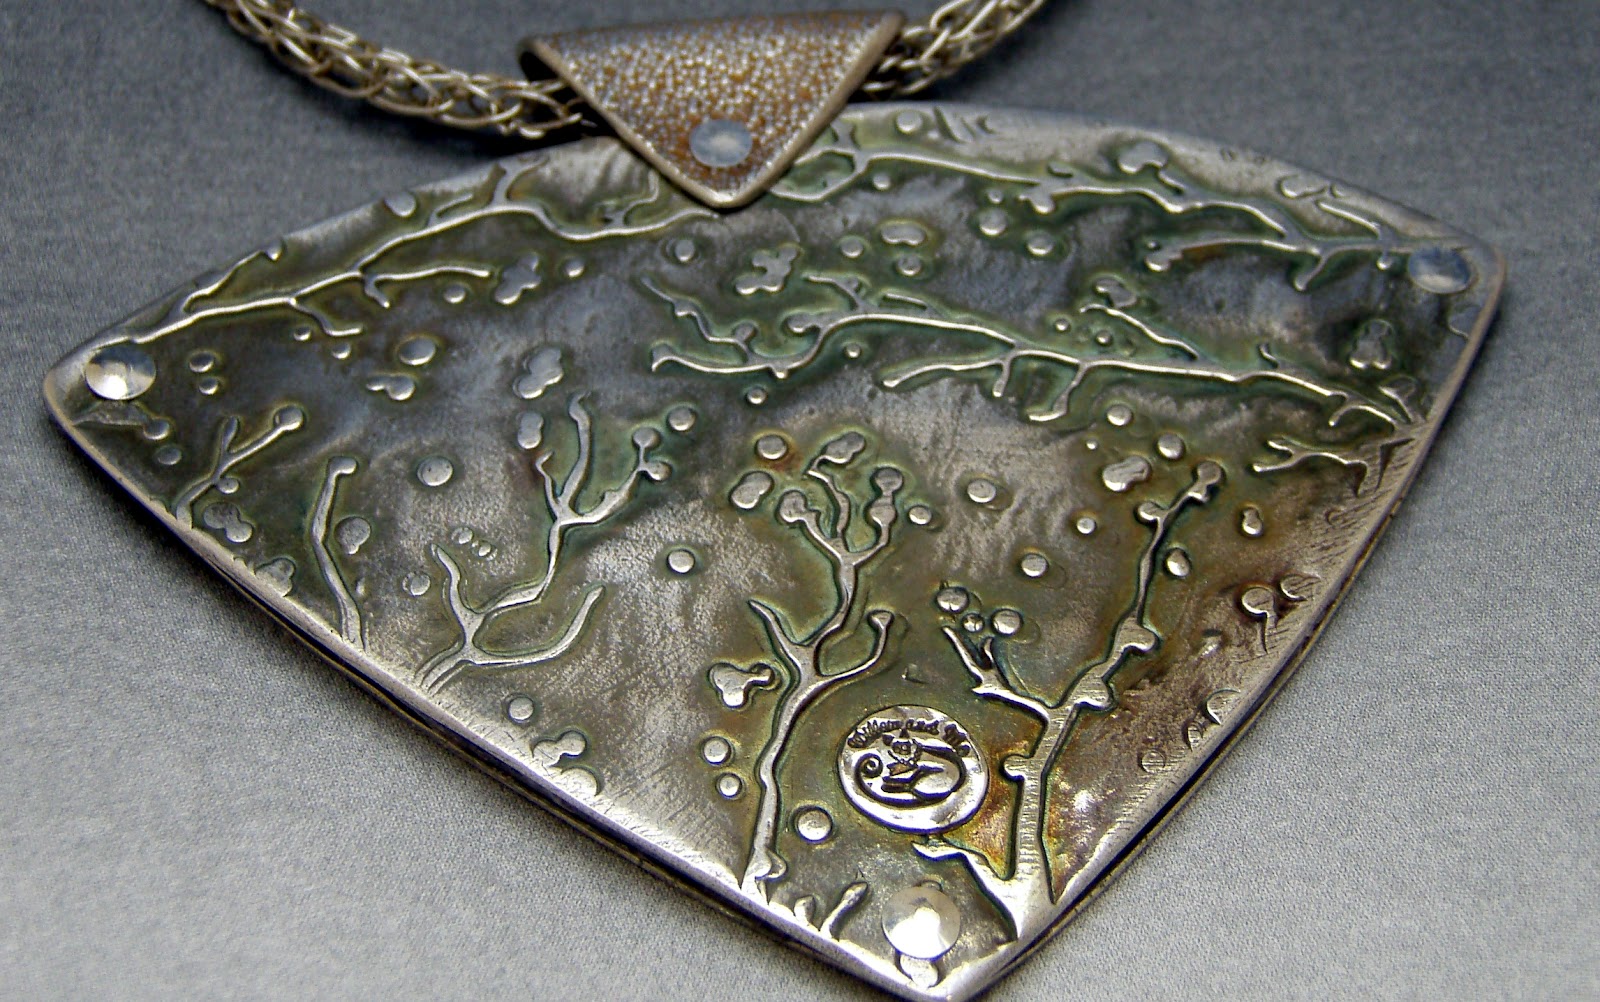
Keep an eye out here and on my Facebook page for new pieces and other news.  Let's hope for a happy 2013.  For now I will leave you with some pictures of my favorite pieces from 2012.


Thursday, September 27, 2012

Time Flies

I can't believe it's already almost October!  So many things that seemed so far away have come and gone:  Our busy season at the museum, my metal clay adventure/vacation (at which I learned that four days isn't nearly enough time to spend working on clay with friends) and the beginning of school (I can't believe my youngest is a senior this year), among them.

I have been working furiously to get some pieces made and sent to Archipelago after my biggest month of sales there (yay).  Much of it is on my bench waiting to be finished but I do have a few small things left to fire.

Before time gets away from me again, I wanted to list what is coming up for me this fall as far as shows and classes go.  At the beginning of this year, because of my new job, I decided to only do two shows.  The first was the Fourth of July and it was very successful.  

The other will be the Gifted Hand Show on Friday, November 9 (11:00 to 7:00) and Saturday, November 10 (9:00 to 4:00) at the Ramada Inn in Ellsworth.  This is always an awesome show.  Christina Heiniger does a wonderful job of assembling a wide variety of very gifted artisans and I am honored to be among them again this year.  If you have never been, it is definitely worth a look and a great place to do Christmas shopping.

I have three metal clay classes scheduled this fall through RSU 24 Adult Ed.  They will all be held at my studio at 130 Oak Street, Suite 1, Ellsworth.


Beginner's PMC:  Saturday, October 13, 9:00 a.m. to 4:00 p.m.
Class Fee:  $50; Suppies Fee:  $50 payable to me at the first class

You will learn about the different types of PMC as well as the basics of working with it by making a necklace and earring set.  Bring a bag lunch.


PMC Peekaboo Pendant:  Saturday, November 17, 9:00 a.m. to 4:00 p.m.
Class Fee:  $50; Supplies Fee:  $50 payable to me at the first class

This is an intermediate level class and some PMC experience class is necessary.  You will make a hollow lentil shaped bead with a "peekaboo" hole in which a small stone or bead shows through.  This is a piece made in several steps, which are demonstrated and explained.  You will learn about other hollow forms as well and the skills learned in this class can be used for many types of projects.  The pendant pictured is the first Peekaboo pendant I made, while I was at Haystack.  I still wear it and it never fails to get compliments.  Bring a bag lunch.


PMC:  Beyond the Basics, Saturdays, December 1 and 8, 9:00 a.m. to 4:00 p.m.
Class Fee:  $100; Supplies Fee:  $60, payable to me at the first class

For those who have worked in PMC and would like to expand their skills, this class will cover making your own textures (mold making, photopolymer plates and scratch foam), setting fireable stones and 3D construction.  This will be a very fast moving class and basic metal clay skills are necessary.  Students should bring a bag lunch.


The RSU is offering these classes at incredible prices.  To sign up for these classes, contact RSU 24 Adult Ed by clicking this link or by calling 667-6499.  Feel free to contact me at info@willowandme.com for more information about them.

Coming up very soon (unless time gets away from me again) will be photos of my most recent work and some new items in my Etsy shop.

Saturday, July 7, 2012

I'm in Metal Clay Artist Magazine!

I just got my digital copy of Metal Clay Artist Magazine and I'm in it!  I had been told by a fellow Metal Clay Head that I was, but it's nice to actually see it.

My Luna Moth Pendant is on Page 32 in the Gallery Section, which is devoted to some of the people who entered pieces into the magazine's Metal Clay Plus contest.  I am honored to have made the cut to have my picture in the magazine (there were about 200 entries, I guess) and to be alongside some very well-known and talented artists. 


I was in the magazine once before with my Peekaboo Pendant about this time last year.  It was in the second anniversary edition of the magazine and the Luna Moth is in the third anniversary edition.  Plus, both of them were made at workshops at Haystack Mountain School of Crafts. 

Unfortunately, there are no metal workshops at Haystack this year, but I am excited to be getting together during that same week with three other Haystack friends.  We are going to work on clay at the home and studio of one of the lovely ladies I met my first year (and again last year) near Toronto.  I am so excited and hope that I will be as inspired as I was at Haystack.  I will be traveling with a good friend I also met in my first year, Erin.  With my new job, I have had less time to work on clay so I doubly pleased to have a few days to do nothing but.

The Luna Moth Pendant in the magazine was made at last year's workshop with Patrik Kusek.  He is an awesome and inspiring teacher and I learned so much from him.  Some of it was little "Why didn't I think of that?" things and I think I told him I loved him more than once.  I felt a bit like a groupie with him and Lisa Cain.

We did a lot of work with found objects and I wrote a blog post about it with photos of my pieces. 

Reverse of the Luna Moth Pendant

Wednesday, June 20, 2012

The Dreaded Threaded Vessel Challenge

Once every three months, my Etsy Metal Clay Heads team holds a challenge.  I haven't entered many of them, for various reasons, but decided to this time around.   The challenges have two parts:  a style part and a technical part.  This challenge called for some sort of a vessel with a threaded top with a 1920s-1930s look.

I've done threaded pieces before with success, so I thought this would be a great challenge for me to do.  As practice for working towards the Metal Clay Master's Registry, I made a threaded vessel a couple of years ago, and I was quite happy with it.


So I figured the challenge wouldn't be too hard, but I wasn't counting on the unpredictability of bronze clay.   I didn't want to make a round piece and drew out a texture on scratch foam for the sides that had an Art Deco feel.  I planned on a four-sided piece.

But, I also didn't plan on how difficult it would be to construct a four sided piece around a round thread.  I wanted the threads to be set on the inside of the bottle and have the stopper screw down into it, which is the exact opposite of what most bottles are, I realized after looking at many.

The first piece looked pretty good before I fired it but I fired it on its side and it warped.  I also fired the stopper separate from the bottle, which was the same technique I used for the silver vessel.  Unfortunately, once the bottle warped, there was no way I could get the stopper in and it was too hard to bend it back into shape.


So back to the drawing board I went, this time with a bit of knowledge under my belt.  This time I chose copper clay instead of bronze.  I've had better luck with it.  I constructed the piece a bit differently as well.  It's still four-sided with the same design, but I added upside down triangles to fill in the gaps instead of untextured clay.  I also took the bottom tips of the design to decorate the top. Lastly, I fired the stopper in place this time, after having coated it with paper clay powder.

In the first firing, the bottle sintered and the top seemed okay, but when I went to unscrew it, it simply came off and left the threaded part inside the bottle.  Keeping my fingers crossed, I re-attached the top to the part that was still in the bottle with some thick slip and refired.  This time it worked and the top stayed together when I removed it.  It still didn't feel fully sintered in the middle (I made it hollow) so I fired just the top one more time.

I'm pleased to say it worked and I finally have a piece that is fully sintered and doesn't look too bad.  It's just under an inch an a half tall and about a half-inch wide.


You can find a few more pictures of it, as well as pictures of it before it was fired here.

Even taking the pictures was a challenge.  I must have taken well over 300 pictures and managed to winnow them down to less than a dozen that were clear enough to use.  And the bottle looks much more like bronze than copper in the pictures but nothing I have tried seems to get the color true.  I guess there is a reason why they are called challenges.

Monday, April 23, 2012

The Birth (and Naming) of a New Collection


I recently wrote a blog post  for my Metal Clay Heads Etsy Team.  In it, I discussed my newest sources for inspiration:  Some antique buttons from a client and textures and designs I have found in various pieces of furniture and other items in the small museum where I work. 

Working on new designs based on these things is a departure from the nature-based pieces I have made in the past, and I want to mark this by naming the new line.  After a lot of thought, I have settled on The Nouvelle Collection.


The name has many meanings for me.  First, nouvelle and nouveau both mean "new" in French.  The obvious is that this is a new line, but it is also a play on the term Art Nouveau.  I love designs from that period and my new pieces will be based, in part, on art from that era (and others).  This also marks a new phase in my life, since I have recently taken a new job, after staying home with my children for more than 10 years.

During the last few years as my children have needed me at home less, I have spent more time working on my jewelry as well as teaching metal clay.  Since I will now have less time to devote to working with metal clay, I would like to focus on pieces that challenge me.  I will be drawing and designing more of my own textures and using more advanced techniques in some of my pieces.


Having said that, my first pieces for the Nouvelle Collection are simple post earrings made using some of the antique and vintage buttons I recently received.  My next piece will be a brooch based on a drawer pull on a dresser in the museum.  I hope to chronicle the making of that piece from design to finish and will publish that on the Metal Clay Heads blog.


Thursday, March 29, 2012

Something Unexpected

This is the second version of this post I have written.  The first strangely disappeared.  Remind me never to go to Blogger on my iPad again.

Last night I had a wonderful surprise from a customer.  Last week we had talked about making molds from old buttons.  I bought a few recently, which is what I made my button rings with.


So she brought me a whole tin of buttons that she had gotten from her grandmother.  I think she said that her grandmother had inherited some of them from her grandmother.   I'm  not an expert at dating old buttons, but I do know these are very cool.  The designs and textures are exquisite.  There are some metal ones, what I think is Bakelite, and some black glass ones.  I researched those last night and I learned that black glass buttons became popular after Prince Albert died in the 1860s and Queen Victoria went into mourning.  She wore jet buttons, apparently, but those were too expensive for most people, so less expensive ones were made from glass.


Lately I have been struggling with whatever the metal clay version of writer's block is.  And wondering whether I should continue making jewelry.  My wish for a while has been to make my jewelry and teaching into a full-time job, but the economy hasn't cooperated, and I have taken a job.  I really do like it, but adding it to the mix of obligations has given me very little time or energy to create.  Hence the block or lack of inspiration or whatever.

But the buttons have given me inspiration.  I have been fascinated with the Victorian and Edwardian eras for a very long time and, using the molds I have made from my own buttons as well as my those of my customer, I will begin a new line inspired by those periods.


I'm itching to start.

Friday, February 3, 2012

Six Rings - Part Two

 I had a partially successful firing of the first three rings.  A successful firing, to me, is something I don't have to do anything to after except for polishing.  Unfortunately, this wasn't quite the case.

Everything sintered just fine, so in that way it was successful.  The problem was with the shrinkage.  It seems that shrinkage in sterling clay isn't quite as simple as I thought.  In the last post, I said that the clay didn't shrink as much as the package said it would.  I would like to rephrase that.  The ring shanks don't seem to shrink 25 percent.  The settings for the stones, however, do.  The settings shrunk enough to pop out the stones on two of the rings.  One was pretty simple to fix, but the other took a bit more work.  In the end I did get both stones set.  


The second set, with the small stones was a bit easier knowing what to expect as far as the shrinkage went. 


All six came out of the carbon with a small bit of yellowish coating that was easy to remove with a scratch brush.  About an hour in the tumbler was enough to brighten them up.  They seem to be much stronger than the same rings in fine silver would be.  I cannot bend the bands.  


I loved making these rings.  My favorite setting is the one with just the four corners, with the channel on just two sides running a close second.  I will continue to work with sterling clay, and I want to explore the shrinkage issues a bit more.

Friday, January 20, 2012

Six Rings - Part One

A while back I made a couple of rings with square stones.  They weren't exactly alike, but similar enough that they went well together stacked.  A customer bought them and asked me to make another, similar but not the same, so she would have three to stack.  When she picked up the set, she asked if I could make three more.  She wanted a total of six, three with smaller stones, three with larger.

When I made the first three, sterling silver clay was not yet available, so they are fine silver.  I made them thick enough so they would be fairly strong, but I knew the two colors of silver wouldn't match perfectly.  The more I thought about it, the more I wanted to make all six out of the new sterling silver.  They would be stronger and all six would match in color.

I made a prototype ring.  I came out great, but didn't shrink as much as I thought it would.  But now I have a good idea of ring shrinkage on sterling, which doesn't seem to be anywhere near the 25% shrinkage rate I have read.

So accounting for the new shrinkage factor, I started making the rings.  For thin rings like this, I use a method I developed so that the ring shank is seamless (rather than cutting a strip and wrapping it around a mandrel and joining it).   I started writing a blog post about the process a long time ago, but never got around to publishing it.  I will give a step by step tutorial at some point, but right now I will just go over the highlights of making this particular set of rings.


I cut all the ring shanks out of sterling silver clay and left them on brass tubes so they would keep their shape while drying.  It also gives you something to hold onto when working with the shanks.  I usually only do a rough shape in the wet clay and do most of my work in the dry clay state.

Because I made a mistake when ordering the stones, I only had the larger stones, so I set aside three of the shanks for later and roughly set the three stones in clay.  The colors are hard to see in this picture but they are deep purple, sapphire blue and ruby red.  The stones are absolutely gorgeous.  I may have to make something for myself with the ones I have left.


I then start filing the ring shanks so they are an even thickness all the way around.  You can see in this picture that I don't cut them completely round because I want to have the top of the ring have some kind of a shape.


I put them all on the same tube so I could file them together and be sure the sizes and shapes of the shanks matched.


After I do some rough shaping of the shank, I will also roughly shape the stone setting and then attach it to the shank with slip.


In the photo below, you can see all three drying.  On a couple of them, you can see marks where I have drawn out the shape in Sharpie.


After they are dry, I fill in the gaps with clay and build up areas that might need it.  Once that is all done, I start on the refining of the shape.  On the ring below, I wanted the stone to be held on just two sides and so I carved away the clay where I wanted it to be open.  You can't see it very well in the photo because of the angle, but the opening goes under the stone and right through to the other side.  Once this ring is fired, the shrinkage will hold the stone in place securely.


I also wanted to carve a little design on the sides of each ring as something special that only the wearer can really see.  You can see that I have sketched it out in pencil and below shows my favorite tool for carving like this.  It's just an awl with a shortened shaft.  It has a nice sharp point and gives a pretty good impression.


Finally, after sanding, shaping and refining the surface on each ring, I carved a design on each.  The very last thing I do before firing is to thoroughly clean the surface of the ring so that there is no dust left on it.  Also cleaning the stone with alcohol is necessary because any dust left over from sanding will fuse to the stone during firing.

Here are the three rings ready to be fired.  Sterling clay requires a two-part firing, which I will discuss in my next post.